
Dough Sticking to Banneton? Use This 5-Cause Map
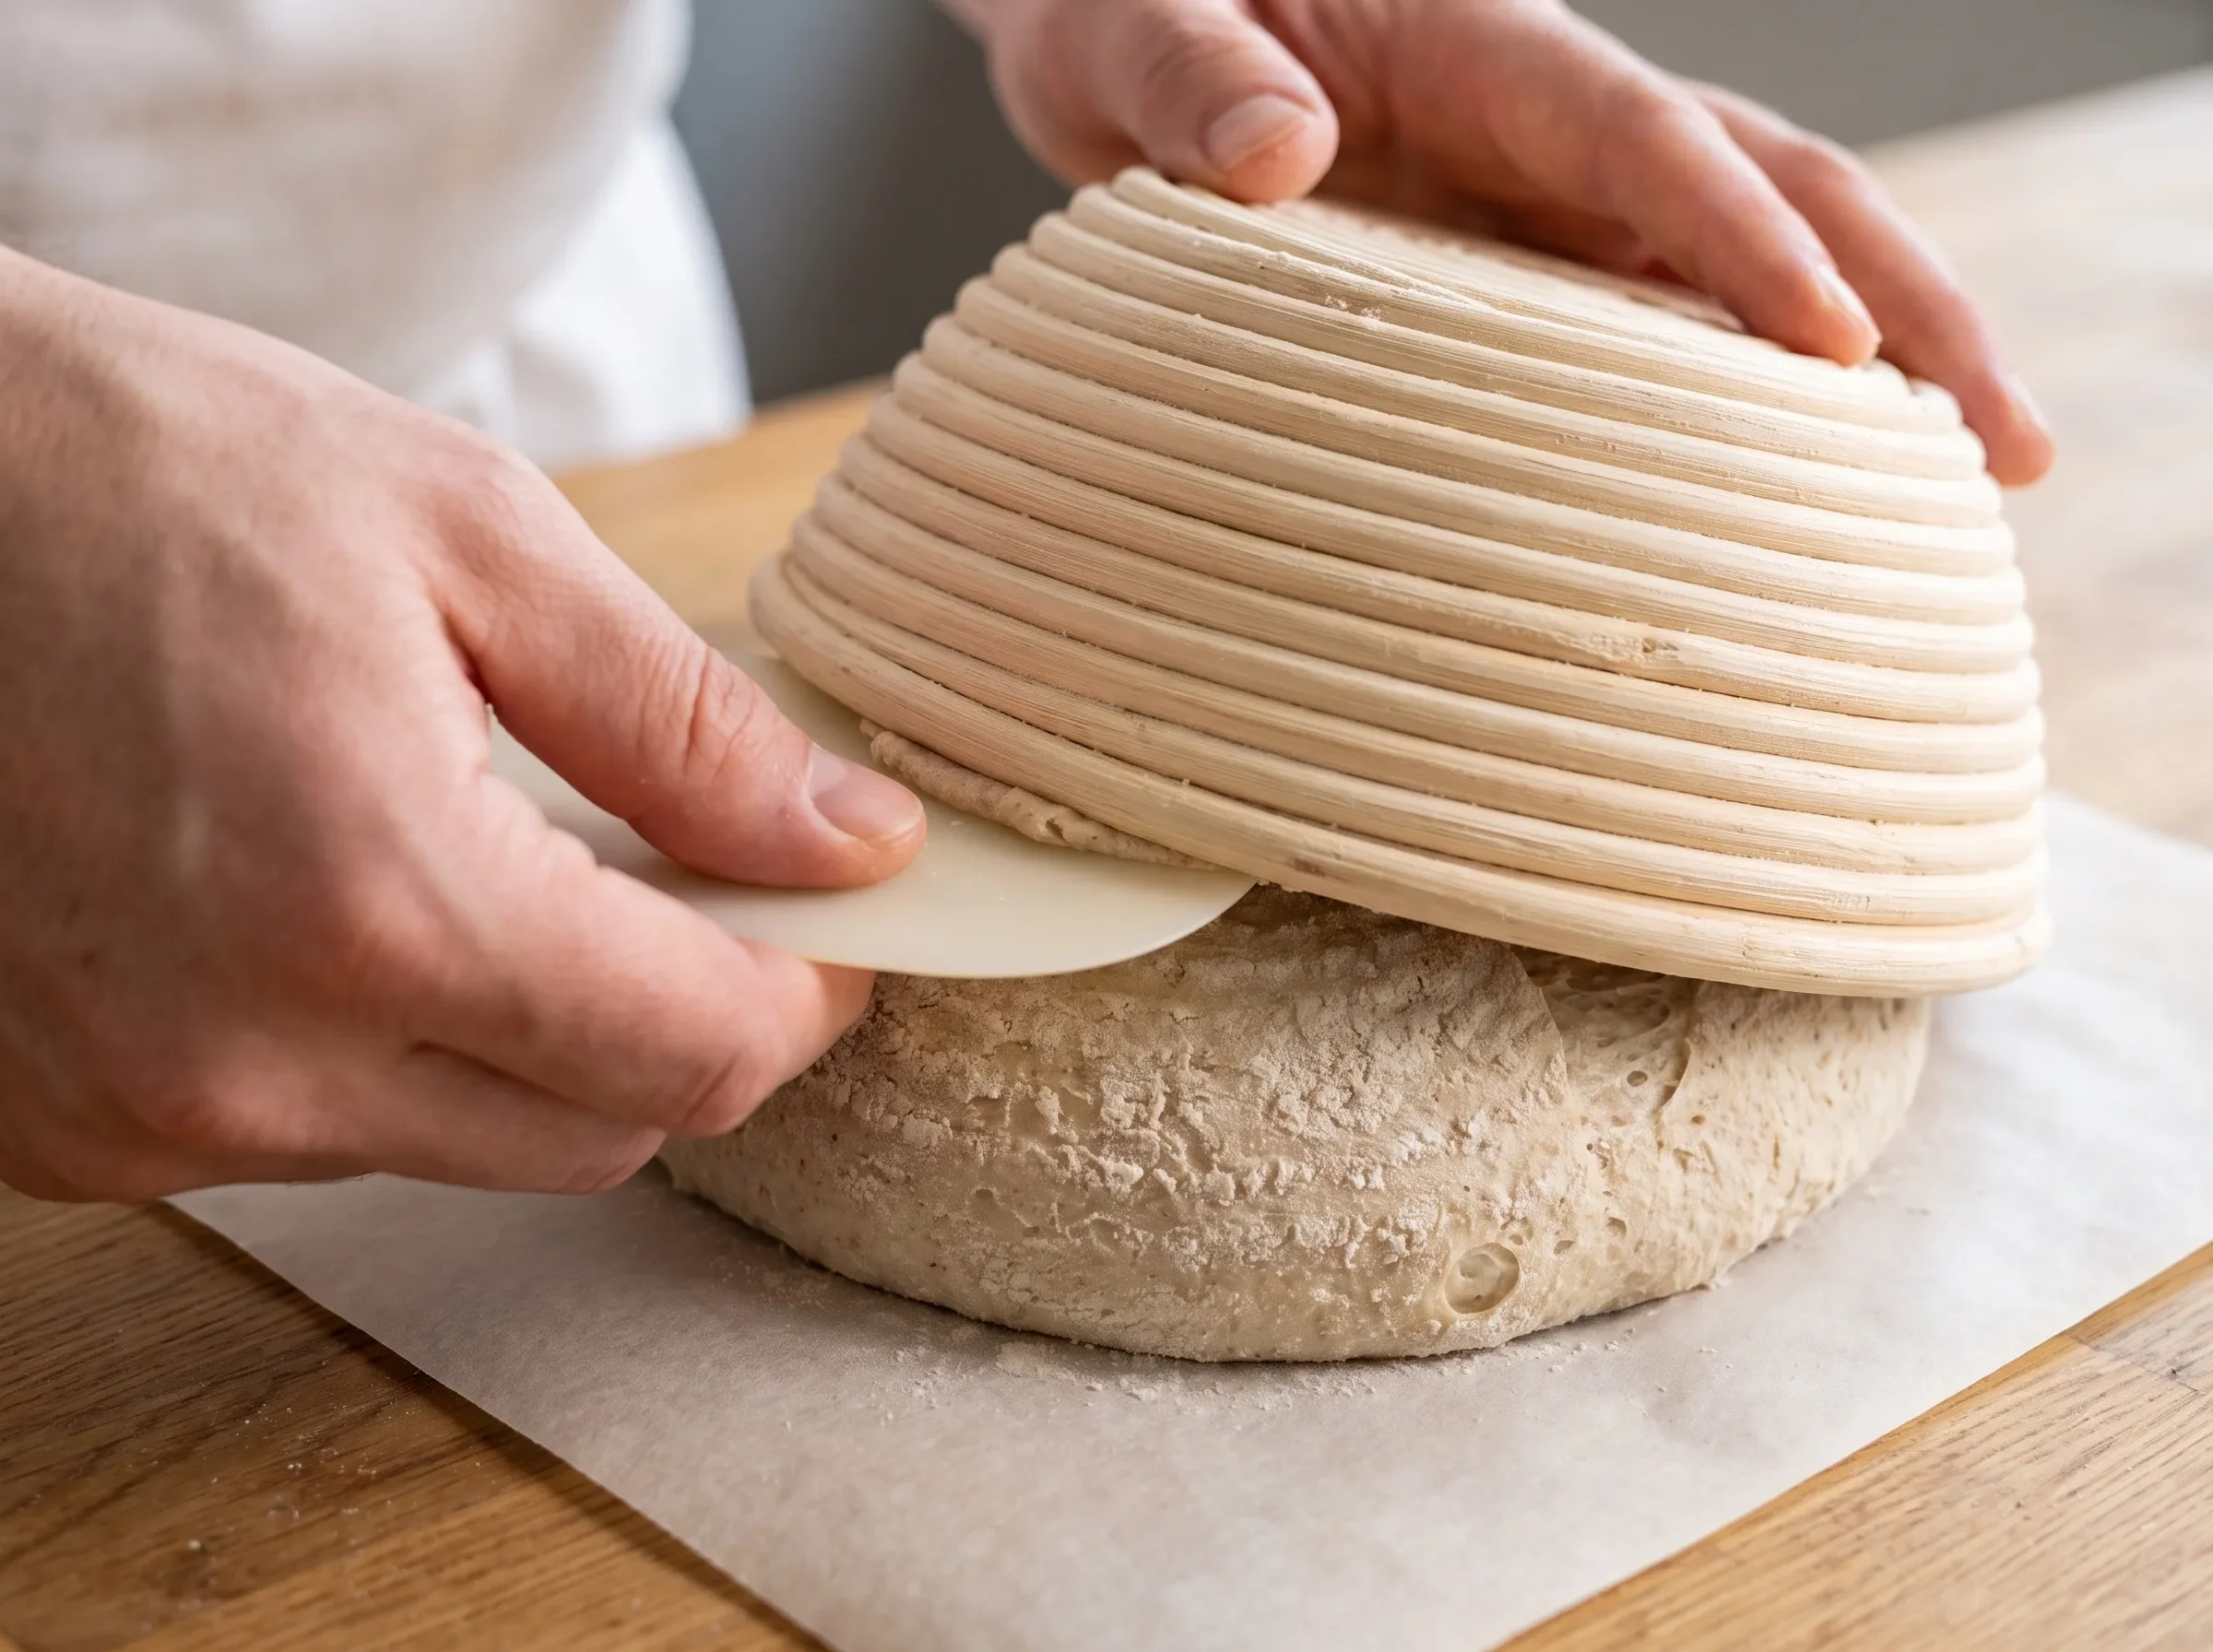
Your loaf is probably still bakeable. If your dough is sticking to the banneton right now, don’t yank it. Turn the basket over onto parchment or your baking surface, wait 30 to 60 seconds, then lift the basket slowly and ease away any stuck edge with clean fingers or a flexible dough scraper.
If the dough tears, slumps, or looks scarred, you can usually still bake it. It may not be your prettiest loaf. That’s okay. Score lightly, handle it as little as possible, and get it into the oven.
Sticking usually comes from one of five causes: the wrong flour barrier, a damp basket, overproofing, hydration that’s too high for the dough’s strength, or weak shaping. Use this diagnosis map to match what you saw, fix the current loaf, and prevent the same problem next bake.
Key Takeaways
Don’t pull stuck dough hard; invert, wait briefly, and release gently.
Rice flour or a rice-flour blend usually works better than wheat flour as a dry release barrier.
A damp basket, overproofing, wet dough, and weak shaping can all cause sticking.
A lightly floured liner is useful insurance for wet or delicate dough.
Change one variable next bake so you know what fixed the problem.
Why is your dough sticking to the banneton?
Dough sticking to a banneton usually means the dough surface and the basket surface became too attached. The most common reasons are a hydrated flour barrier, lingering moisture, overproofing, excessive stickiness, or not enough surface tension. Use the table below before changing your whole recipe.
| What you saw | Likely cause | Fix now | Prevent next bake |
|---|---|---|---|
| Gummy flour paste or dough skin left in the basket | The release flour absorbed moisture | Wait briefly, then ease the dough free without pulling | Use rice flour or a rice-flour blend and cover every contact area |
| Basket or liner feels cool, clammy, or damp | Moisture hydrated the flour barrier | Release gently and bake, even if marked | Let the basket and liner dry completely before reuse |
| Dough spreads, slumps, or won’t hold form | Overproofing | Transfer with parchment support and bake promptly | End final proof earlier and use dough cues, not the clock alone |
| Dough feels sticky everywhere | Hydration exceeds current dough strength or handling | Use a scraper and parchment to minimize handling | Reduce water modestly, strengthen the dough, or use a liner |
| Dough smears into grooves and lacks a taut skin | Weak final shaping | Release with support and avoid aggressive late reshaping | Build a taut surface before placing dough seam-side up |
More than one row can be true. A wet dough can also be overproofed. A damp liner can make a thin flour coating fail. Start with the earliest thing that looked wrong.
Cause 1: Did the flour barrier turn gummy?
A gummy flour barrier is the most likely cause when paste-like flour, peeled dough skin, or sticky patches remain in the spiral grooves. This banneton sticking fix starts with better release flour, but coverage and timing matter just as much as flour choice.
What you saw
You turned out the loaf and found wet flour stuck to the basket. Maybe some dough skin stayed behind in patches. The sticking was probably worse where flour coverage looked thin, uneven, or rubbed away during loading.
This is the classic “dough stuck to proofing basket” moment. It feels like the basket grabbed the dough, but the real problem is often the layer between them.
Why it happened
Wheat flour can absorb moisture from the dough and turn tacky. Once that happens, it stops acting like a dry release layer and starts behaving more like paste.
Still, don’t blame wheat flour alone. Too little flour, missed corners, a wet dough surface, or a long warm proof can make almost any dusting layer struggle. The goal is not to bury the dough in flour. The goal is to create a thin, dry, complete barrier.
Fix this loaf
Leave the inverted basket in place for a short moment and let gravity help. Then lift slowly. If one section clings, pause and ease that edge free with clean fingers or a flexible dough scraper.
Don’t scrape hard against the basket. Don’t tug the whole loaf from one stuck spot. If a small patch tears, accept it and move on. The oven can still give you a good loaf.
Prevent it next bake
Dust every dough-contact area with rice flour or a rice-flour blend immediately before loading the shaped dough. Rotate the basket as you dust so the sides, base, and groove edges are covered.
That’s the short version: dry surface, complete coverage, gentle loading. Keep the dusting layer thin but visible rather than heavy and clumpy.
Cause 2: Was the basket or liner still damp?
A damp banneton or liner can make dough stick even when your flour choice is fine. If the rattan or cloth felt cool, clammy, or recently washed, moisture may have hydrated the release flour before you ever turned the loaf out.
What you saw
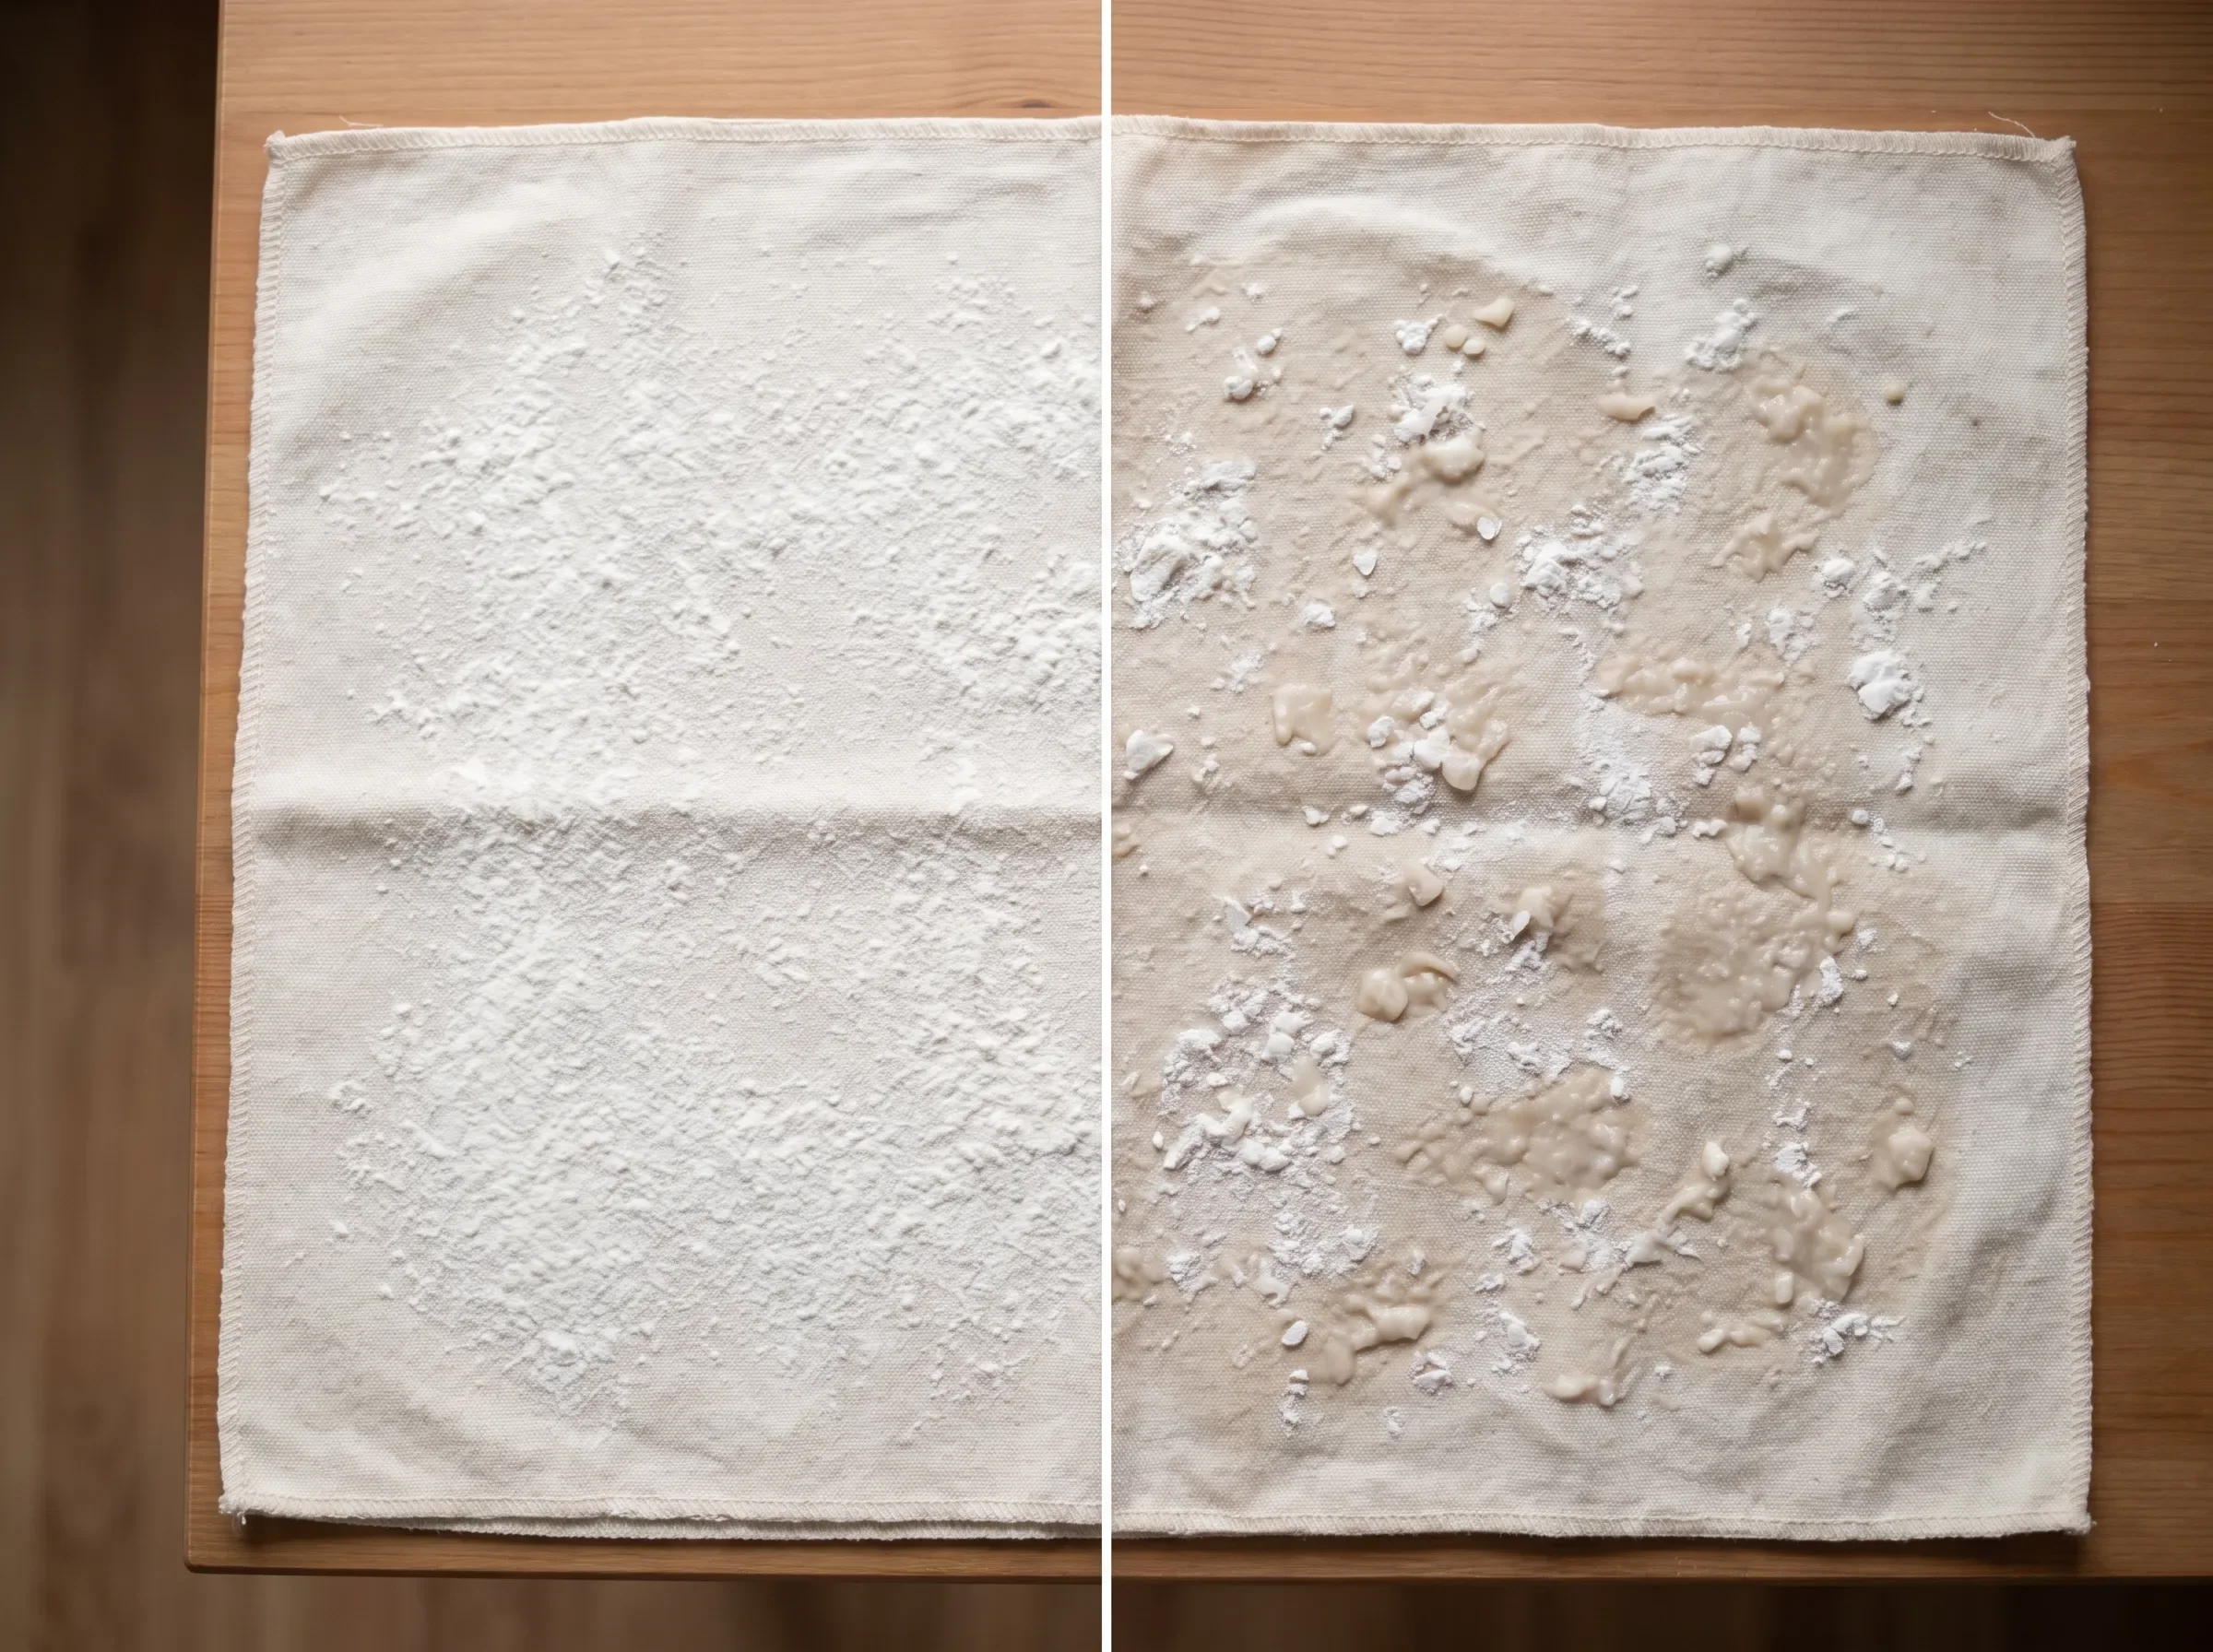
The basket may have felt slightly cool to the touch. The liner may have seemed clean but not fully dry. The release flour might have looked translucent, clumped, or glued to the dough instead of sitting powdery on the surface.
This can happen with rattan and cloth liners. A liner helps with release, but it isn’t magic if it starts damp or under-floured.
Why it happened
Flour works as a release layer when it stays dry enough to separate dough from the proofing surface. If the basket or liner holds moisture, that barrier starts hydrating early.
Then the dough, flour, and basket contact points become one sticky layer. Wet dough makes it worse, but even moderate dough can cling when the proofing surface isn’t fully dry.
Fix this loaf
Invert the dough onto parchment and give it time. Gravity is safer than force. If the surface gets marked, bake anyway.
Avoid repeated flipping. Every flip increases the chance of tearing, deflating, or stretching the dough. Once it’s out, support the loaf and move it toward the oven.
Prevent it next bake
Let the basket and liner dry completely in moving air before storage and reuse. If you clean your banneton, treat drying as part of the process, not an afterthought.
Keep this diagnostic step simple: the basket or liner should feel dry before flouring, before loading dough, and before being stored away.
Cause 3: Did the dough overproof?
Overproofed dough often sticks because it becomes fragile, slack, and harder to release cleanly. If your sourdough stuck in the basket and then spread quickly after release, proofing may be the main issue rather than the basket itself.
What you saw
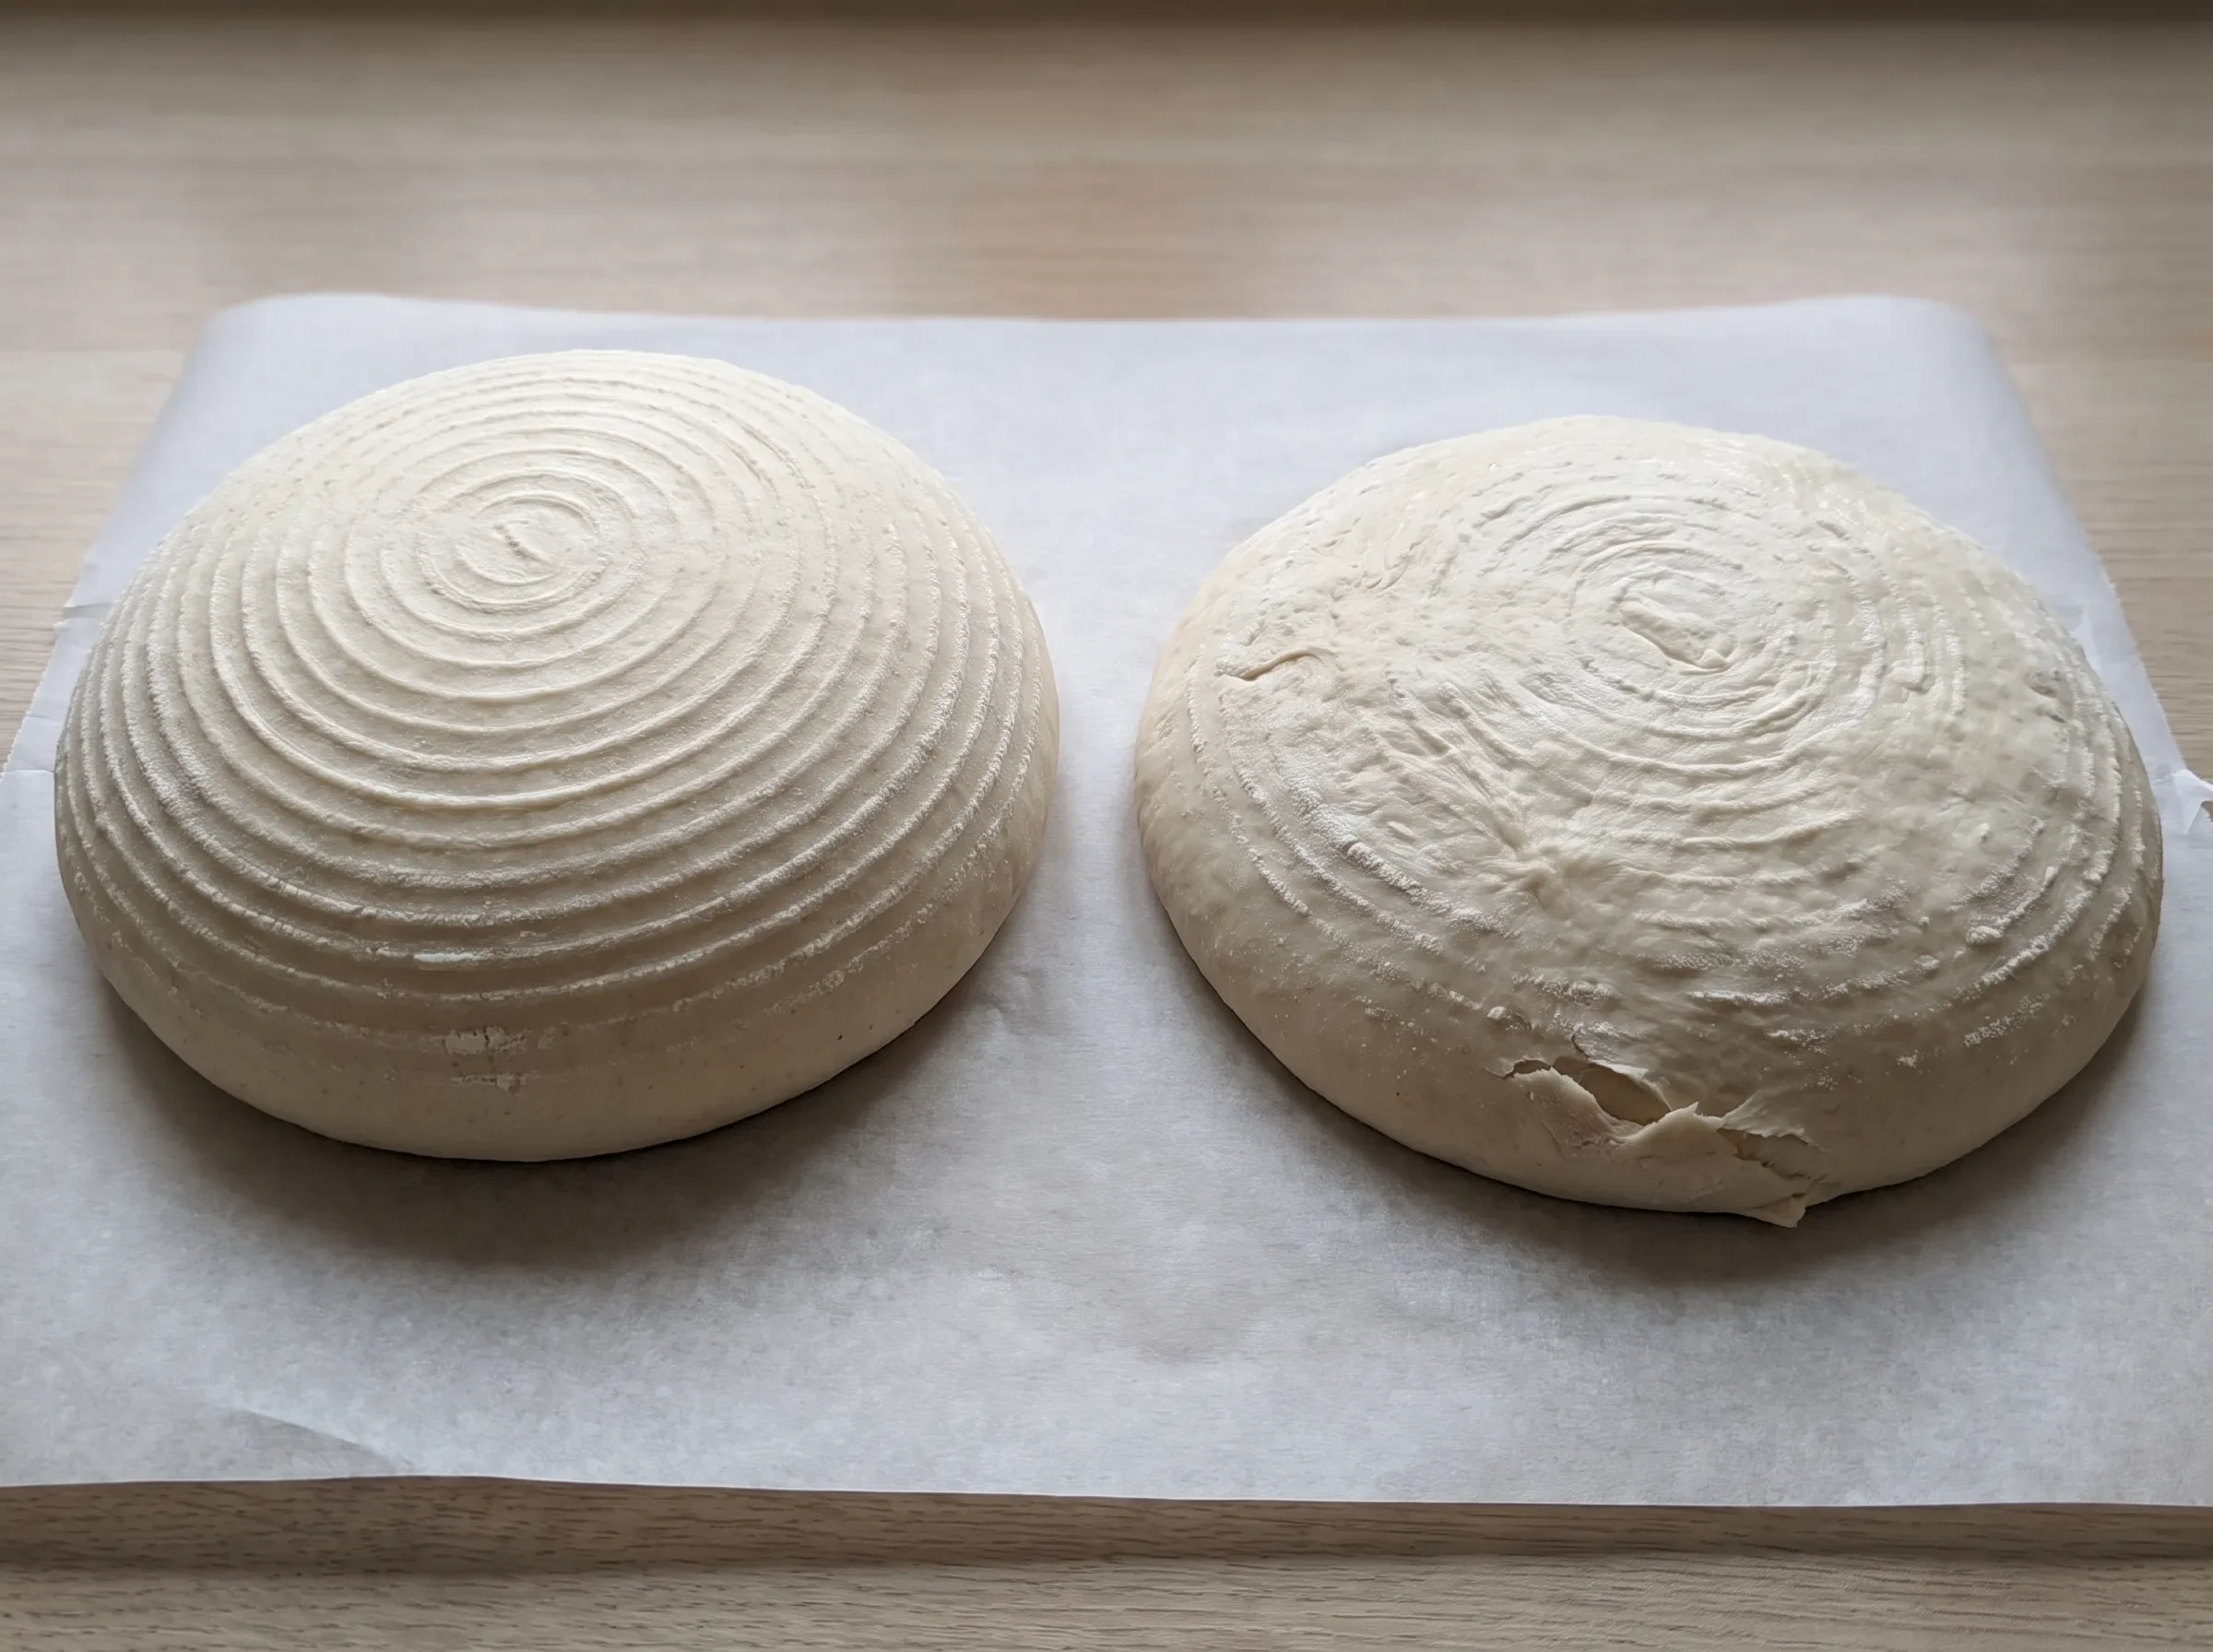
The dough looked very puffy in the basket, but it collapsed or spread when released. It may have felt delicate, jiggly, or hard to score. A thin skin may have stayed behind in the banneton.
This kind of sticking feels different from a simple flour problem. The whole loaf may seem tired, not just attached.
Why it happened
As fermentation goes too far, the dough can lose strength. The surface becomes more fragile, and the loaf may not hold the tension created during shaping.
Warm dough reaches this point faster than a recipe’s stated time might suggest. Your kitchen, dough temperature, starter strength, flour, and loaf size all affect timing. The clock helps, but it can’t read your dough for you.
Fix this loaf
Support the dough with parchment, minimize handling, score conservatively, and bake promptly. Don’t expect late reshaping to restore a fully overproofed loaf.
If the dough has enough strength left and you catch it early, a gentle tuck may help. If it’s already slack and airy, more handling usually makes things worse. When in doubt, bake it.
Prevent it next bake
Shorten the final proof or move the dough to the refrigerator earlier. Watch dough expansion, surface feel, and the response to a gentle press alongside time and temperature.
Ask yourself: did the dough look ready before the timer said it was ready? If yes, trust the dough next time. A slightly earlier bake is often easier to manage than a loaf that has gone too far.
Cause 4: Was the dough too wet for its current strength?
High-hydration dough is more likely to cling when flour absorption, gluten strength, fermentation, or handling technique can’t keep up. If the dough felt sticky everywhere, the issue may be the dough system, not just the banneton.
What you saw
The dough stuck to your hands, scraper, counter, and basket. It spread during shaping and never developed a dry, taut outer surface. The sticking wasn’t limited to one missed patch of flour.
This is especially common when a baker moves to wetter sourdough before the dough has enough strength or the handling routine feels comfortable.
Why it happened
Hydration doesn’t act alone. A dough can feel manageable with one flour and soupy with another. Mixing, folds, fermentation, salt, flour strength, and room temperature all change how wet dough behaves.
So don’t chase one “safe” hydration number. Instead, ask whether this dough had enough structure before it entered the banneton. If it already felt loose and tacky, the basket simply revealed the problem.
Fix this loaf
Use a flexible scraper and parchment to reduce direct handling. Move the dough with support instead of trying to lift it by hand.
Don’t knead raw flour into fully fermented dough as a rescue. It usually creates streaks and damages structure. If the loaf spreads, bake it anyway. It can still have good flavor and texture.
Prevent it next bake
Reduce hydration by a small amount, such as two to five percentage points, then compare the result. You can also strengthen mixing and folds before changing the formula.
For wet dough or repeat sticking, use a lightly floured liner as release insurance. RattanVibe recommends the included cloth liner for wet, delicate, or stressful turn-outs because it gives the dough a smoother contact surface without asking you to change the whole recipe.
Every RattanVibe banneton ships with a free liner. If you need a replacement, choose a liner that matches your existing basket’s shape and size rather than buying a new basket just to solve a release problem.
Cause 5: Weak final shaping left the surface too loose
Weak shaping can make dough stick because a loose, tacky surface presses into the basket grooves. If the dough entered the banneton puddly or wrinkled, the release problem may have started before proofing began.
What you saw
The dough lacked a smooth outer skin. It smeared deeply into the rattan pattern or stuck unevenly around folds. When released, it may have looked stretched, folded, or torn rather than cleanly supported.
This doesn’t mean you failed at shaping. It means the dough didn’t have enough surface tension for the basket, proof time, and hydration level you used.
Why it happened
A taut outer surface creates a cleaner contact layer between dough and basket. A loose surface exposes stickier dough to more texture and more contact points.
Underdeveloped gluten can also make shaping difficult. So can excessive fermentation. If the dough tears while shaping, you may be trying to build tension after the dough has already lost too much strength.
Fix this loaf
Transfer the dough with support and avoid aggressive reshaping after final proof. If it tears, tuck only loose edges that move easily without major deflation.
Then bake it. A loaf with a scar can still be delicious. The fix for weak shaping belongs on the next bake, not in a last-minute wrestling match.
Prevent it next bake
Build a smooth, supported surface during final shaping without tearing it. Place the dough seam-side up in the banneton so the tighter outer surface sits against the dusted basket.
Keep this simple. You don’t need a full shaping overhaul during a troubleshooting session. Aim for one improvement: a dough surface that looks smooth, gently taut, and strong enough to lift.
What if more than one cause matches?
Sticky dough often comes from a chain of factors. High hydration plus weak shaping can look like a basket problem. Overproofing plus a damp flour barrier can make the dough cling and collapse at the same time.
Start with the earliest observable problem. Was the basket damp before the dough went in? Did the dough feel sticky before shaping? Did it look overproofed before release? Change one major variable on the next bake so the result is interpretable.
Use this order: dry the basket, improve the flour barrier, check proofing, then adjust hydration or shaping. If every loaf sticks despite those changes, inspect basket condition and dough-to-basket fit before replacing anything.
How to stop dough sticking to banneton next bake
The best way to stop dough sticking to banneton is to stack several small habits, not depend on one perfect trick. Keep the surface dry, use the right release layer, shape with tension, and make wet dough easier to release when needed.
Use this short checklist:
Start with a completely dry basket or liner.
Dust every dough-contact area with rice flour or a rice-flour blend.
Shape until the dough has a smooth, supported outer surface.
Place the dough seam-side up in the banneton.
Track dough condition, temperature, and expansion during final proof.
If the dough stays difficult to handle, lower hydration modestly on the next test bake.
For wet dough or repeat sticking, use the included liner and flour it lightly.
If replacing a liner, match the liner to your basket’s shape and size.
If your current liner is worn, missing, or the wrong fit, choose a [proofing basket liner](https://www.rattanvibe.com/shop/p/proofing-basket-liner) that matches your existing round or oval banneton. A replacement 2-pack can improve release without making you buy a new basket.
FAQs:
Can I still bake sourdough that tore when it left the banneton?
Usually, yes. Support it on parchment, avoid extra handling, score lightly, and bake promptly. The loaf may spread or bake with a scar, but a torn surface doesn’t automatically mean the bread is ruined. Don’t pull it back into shape if that would deflate it further.
Why did my dough stick to the liner?
A liner can still stick if it’s damp, under-floured, holding residue, or pressed against dough that is overproofed or very wet. Treat the liner as a helpful release surface, not a guarantee. Dry it fully, flour it lightly, and check proofing next time.
### Does high-hydration dough always need a liner?
No. Strong dough, good shaping, a dry basket, and an even rice-flour barrier can release cleanly without a liner. A liner simply makes release more forgiving, especially when you’re working with wetter dough or still building confidence with shaping and timing.
Fix the cause, not just the symptom. One stuck loaf doesn’t mean your banneton is defective. Diagnose in this order: flour barrier, moisture, proofing, hydration, then shaping. Change one thing on the next bake and watch what improves.
If wet dough is the recurring issue, use the free liner included with your RattanVibe banneton. If you need a fresh fit, explore proofing basket liners and choose the shape and size that match your basket.