
How to Prep a Banneton Before Its First Use
A brand-new banneton looks ready to use the moment you unbox it. But if you place soft dough straight into bare, dry rattan, your first loaf may cling to the grooves. That doesn’t mean the basket is defective. It usually means the surface hasn’t been prepared yet.
This guide focuses on using the bare rattan basket without the fabric liner, so you can get the classic spiral pattern. The prep takes about five minutes of active work, plus at least one hour of drying time.
Key Takeaways
Lightly dampen the inside of the banneton; don’t soak it.
Dust generously with rice flour and work it into every groove.
Let the basket dry fully for at least one hour before proofing.
Flour again before adding dough, even after first-use prep.
Use the included liner as a backup for very wet or sticky dough.
RattanVibe care note: Natural rattan works best with light moisture, rice flour, dry brushing, and full air drying. Avoid routine washing, soap, oil, soaking, microwaves, and direct high heat unless specific care instructions say otherwise.
The 30-second answer: How do you prep a banneton?
To prep a new banneton, lightly mist the inside or wipe it with a barely damp cloth. Dust the entire inner surface generously with rice flour. Rub the flour into every ridge, crevice, base corner, and rim. Tap out only the loose excess, then let the basket dry completely for at least one hour.
Before you add dough, dust the basket again with a fresh layer of rice flour. Lightly damp means faintly moist, not wet. If you can see droplets or the rattan feels soaked, you’ve used too much water.
Why should you prep a new banneton before the first loaf?
A new rattan banneton needs prep because its grooves don’t yet hold a working layer of flour. That first thin coating helps create a release barrier between dough and basket. Over time, repeated flouring and thorough drying help the basket become easier to work with.
Think of first-use prep as giving the flour somewhere to grip. The tiny amount of moisture helps rice flour cling to the rattan instead of sliding off the smooth new surface. Once dry, the basket has a more even, lightly floured proofing surface.
This doesn’t replace routine flouring. You’ll still dust the banneton before every proof. It also won’t fix dough that is extremely wet, weakly shaped, or overproofed. If the dough goes into the basket loose and sticky, even a well-prepped basket can struggle.
The goal is simple: start with a clean, dry, evenly floured surface so your first loaf has a fair chance of releasing cleanly.
What do you need before you start?
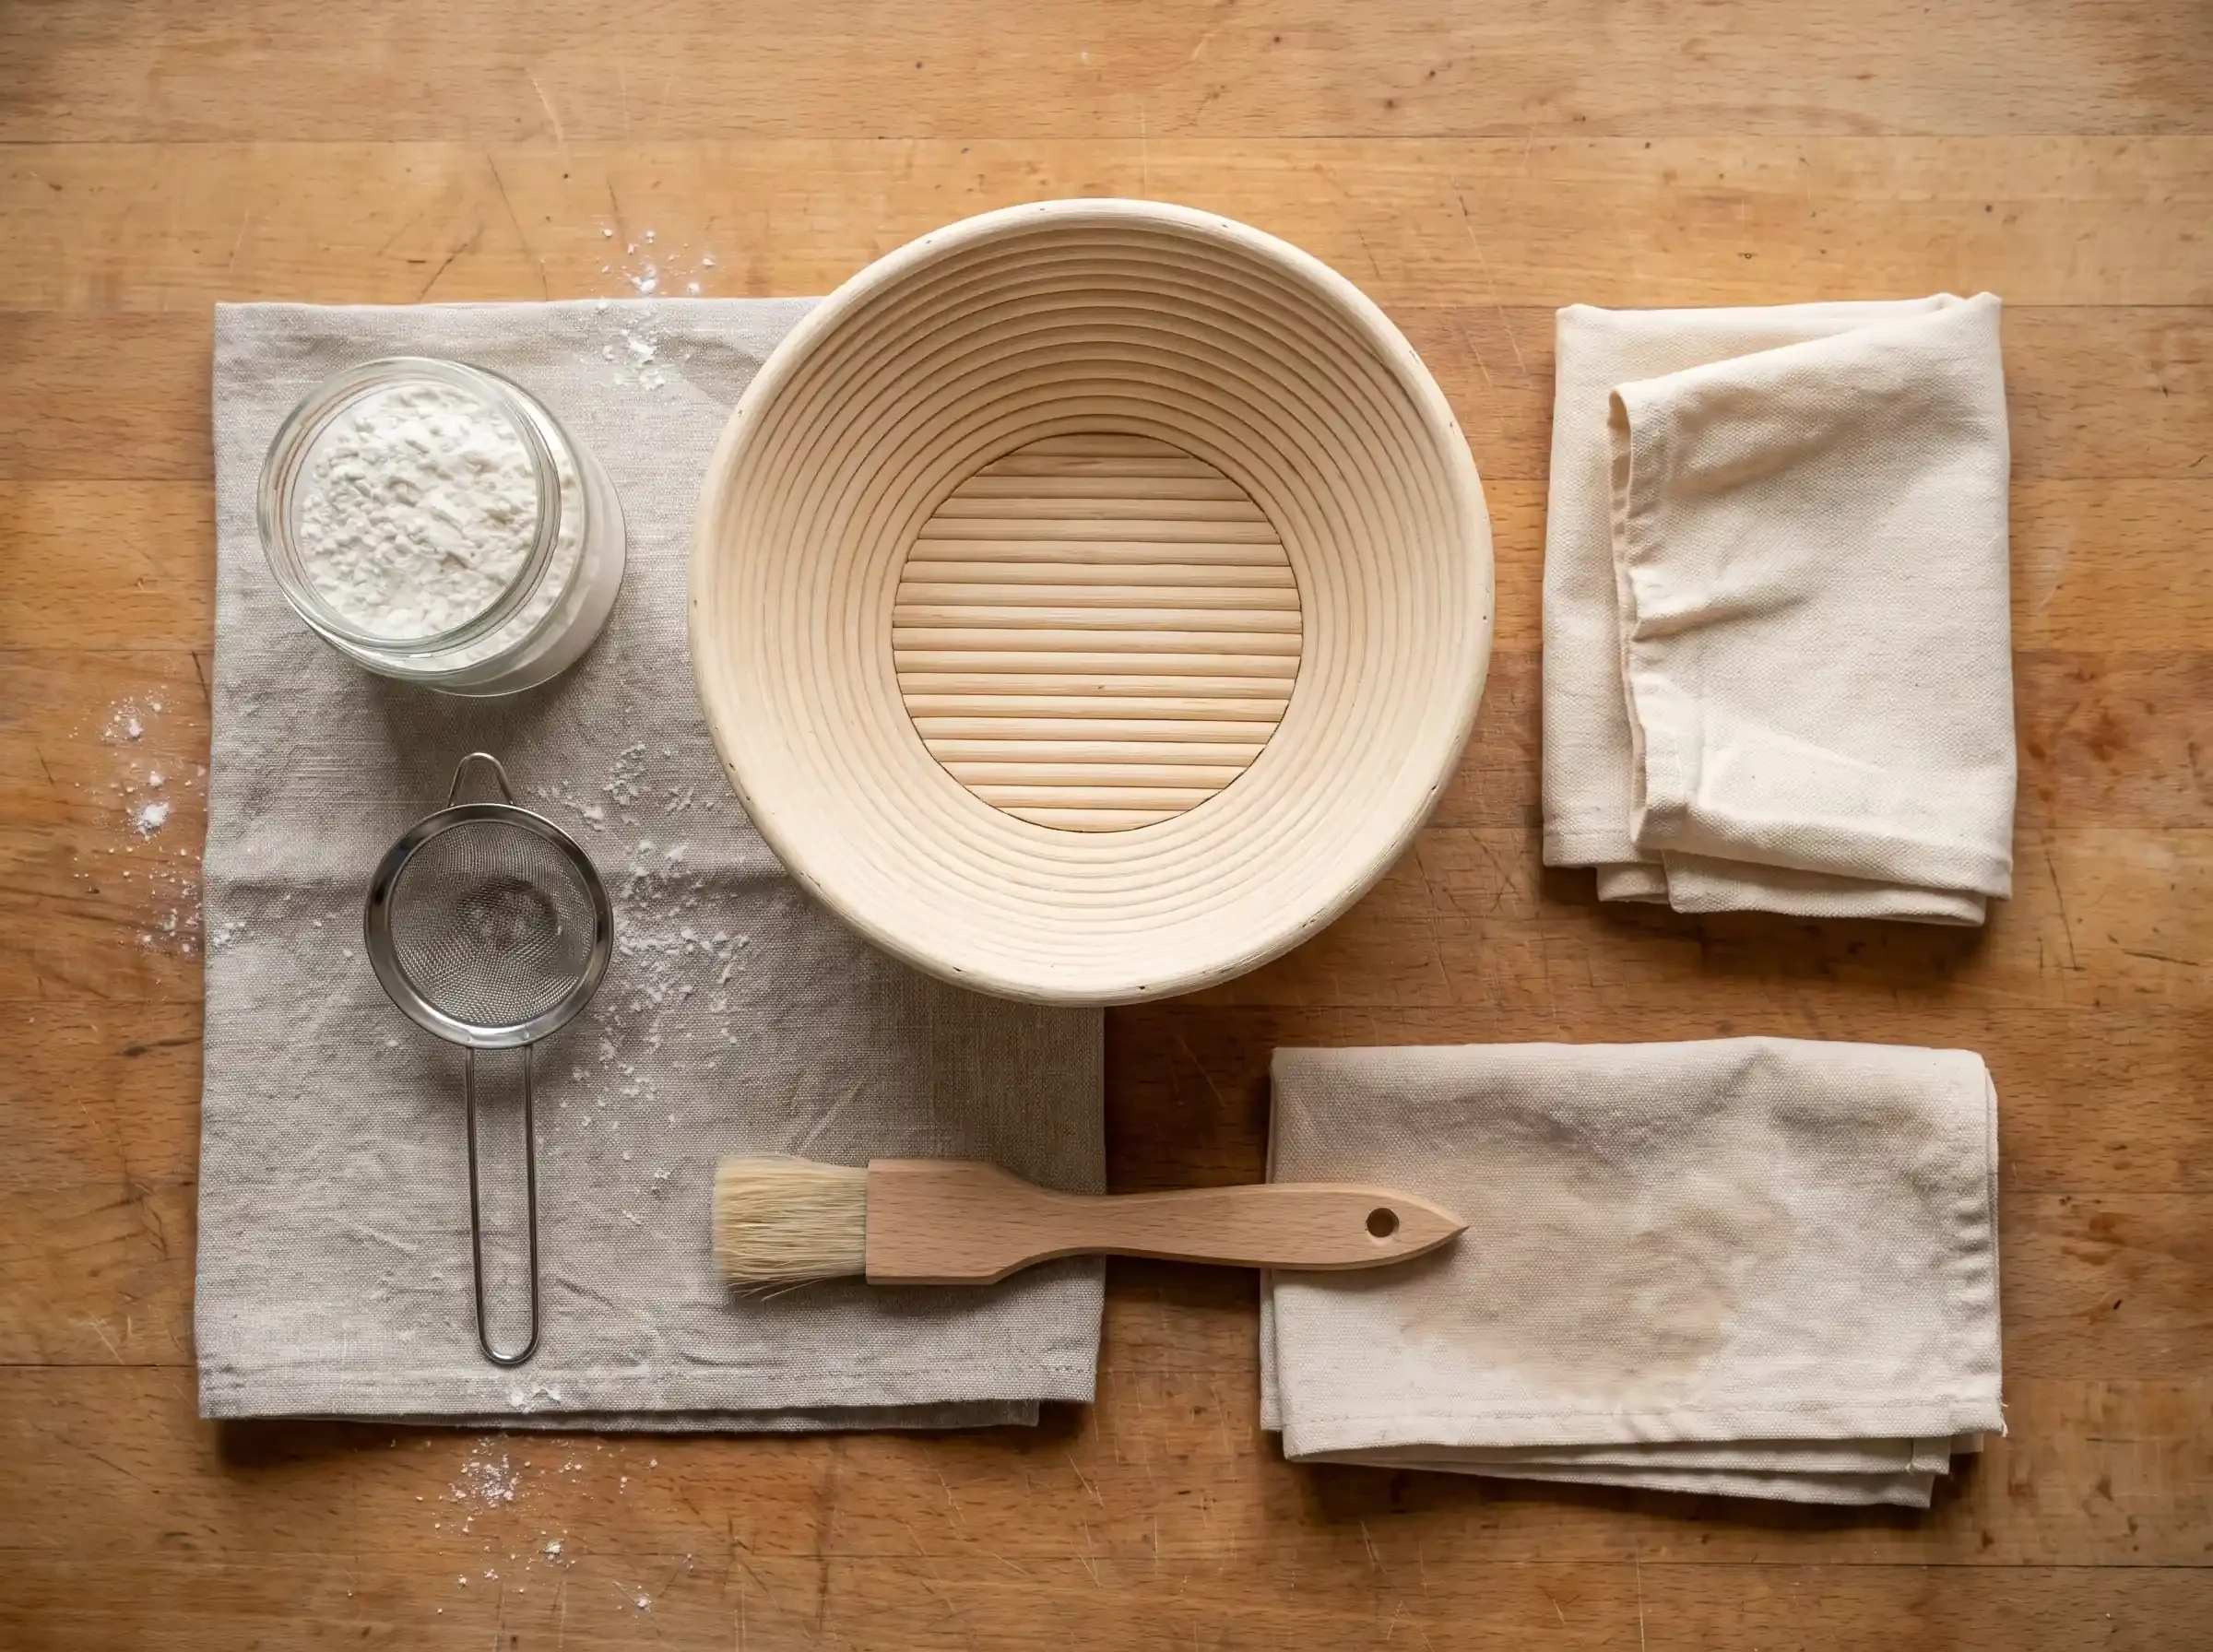
You don’t need a complicated seasoning kit. You only need a few basic items and a dry place for the basket to rest.
Gather these before you begin:
A clean, new natural-rattan banneton
A food-safe spray bottle or a clean, barely damp cloth
Rice flour
A pastry brush, clean hand, or small sieve
A dry, well-ventilated place
An optional towel to catch loose flour
Skip oil, soap, detergent, and soaking. A banneton is a proofing tool, not a baking pan. You’re preparing the rattan to hold flour, not coating it with fat or washing it like a mixing bowl.
Rice flour is the best choice for this first layer because it stays drier against wheat dough. Bread flour or all-purpose flour can work in a pinch, but they absorb moisture more readily and may become paste-like with wet dough.
How do you prep a banneton step by step?
The best way to prep a banneton is to move in order: inspect, lightly dampen, flour, work the flour in, tap out loose excess, dry fully, then flour again before proofing. Don’t rush the drying step. That’s what turns messy flour into a useful release layer.
1. Inspect the new basket
Remove all packaging and look over the inside of the banneton. Check the base, side walls, rim, and any tight spots where loose fibers or packing dust may collect. If you see loose material, brush it away with a dry pastry brush or clean cloth.
You don’t need to wash a clean new basket unless the maker’s care instructions tell you to. Natural rattan is porous, so unnecessary washing can add moisture where you don’t want it.
2. Lightly dampen the inside
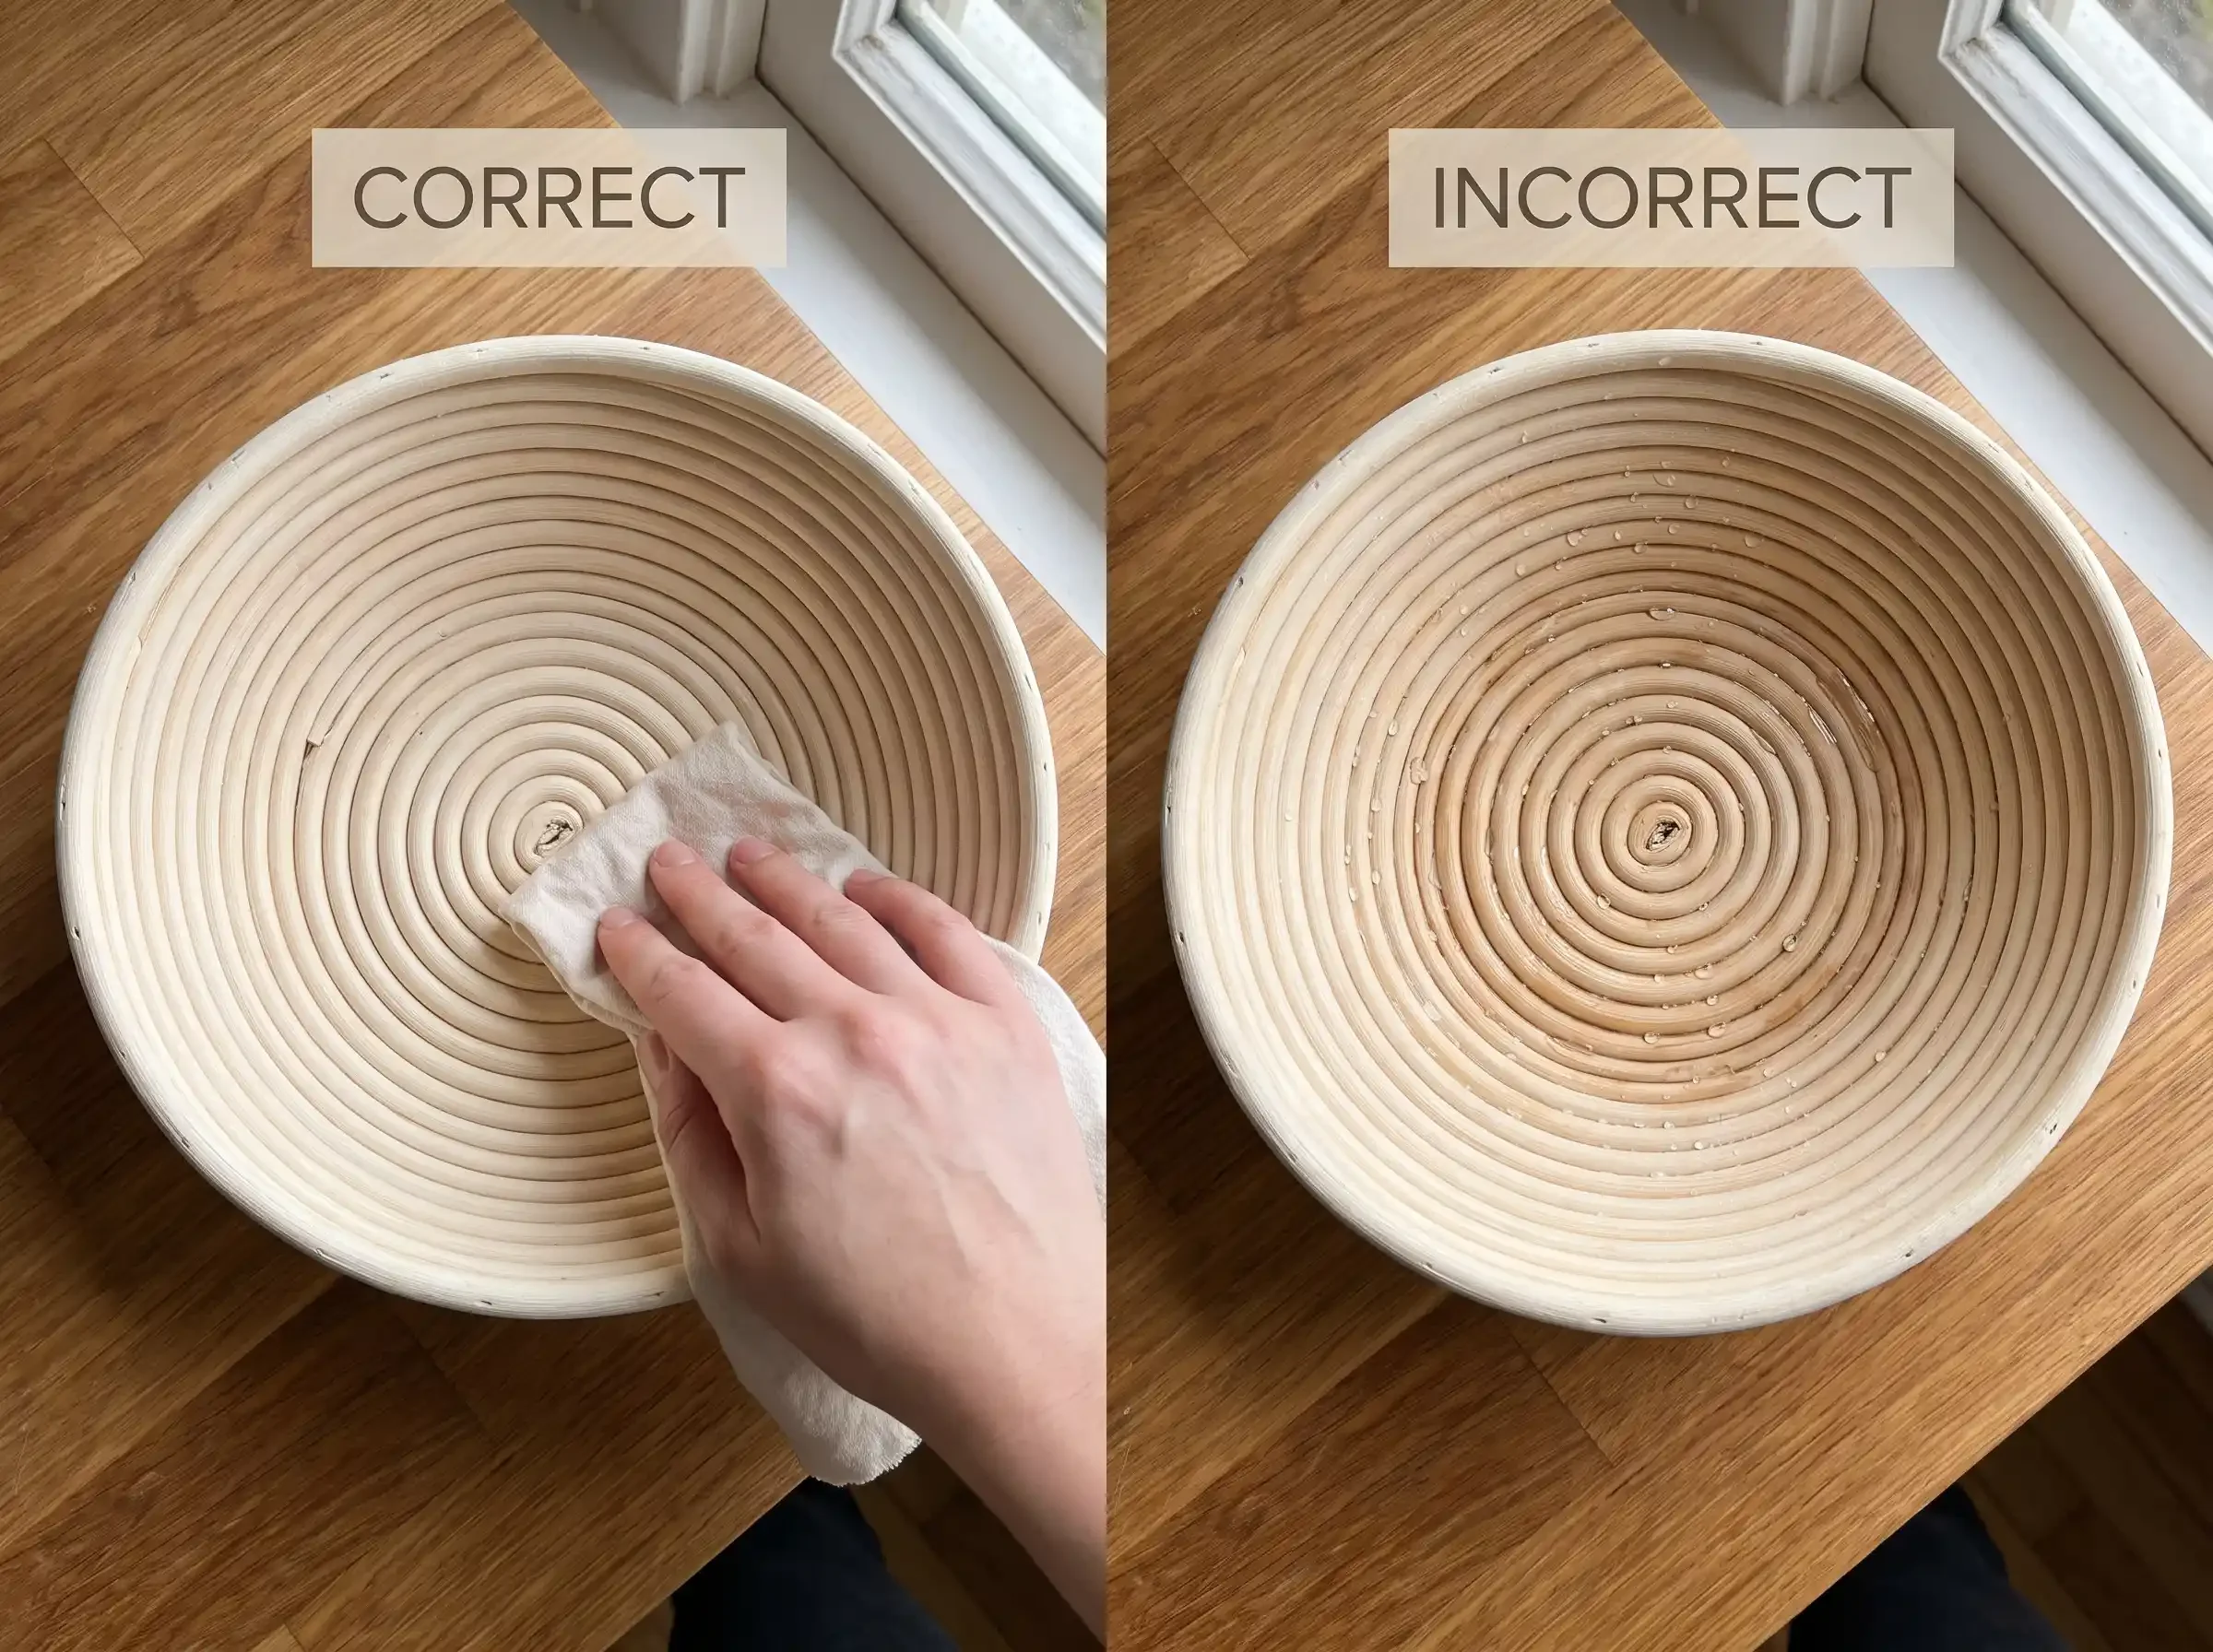
Mist the proofing surface once or twice, or wipe it with a barely damp cloth. Aim for a faintly moist surface that helps flour stick. The rattan should not look wet, and there should be no standing droplets in the grooves.
Why be so careful? Too much water can soften natural rattan, extend drying time, and leave the basket damp when dough goes in. You’re not washing the basket. You’re just giving the first flour layer a little grip.
3. Dust generously with rice flour
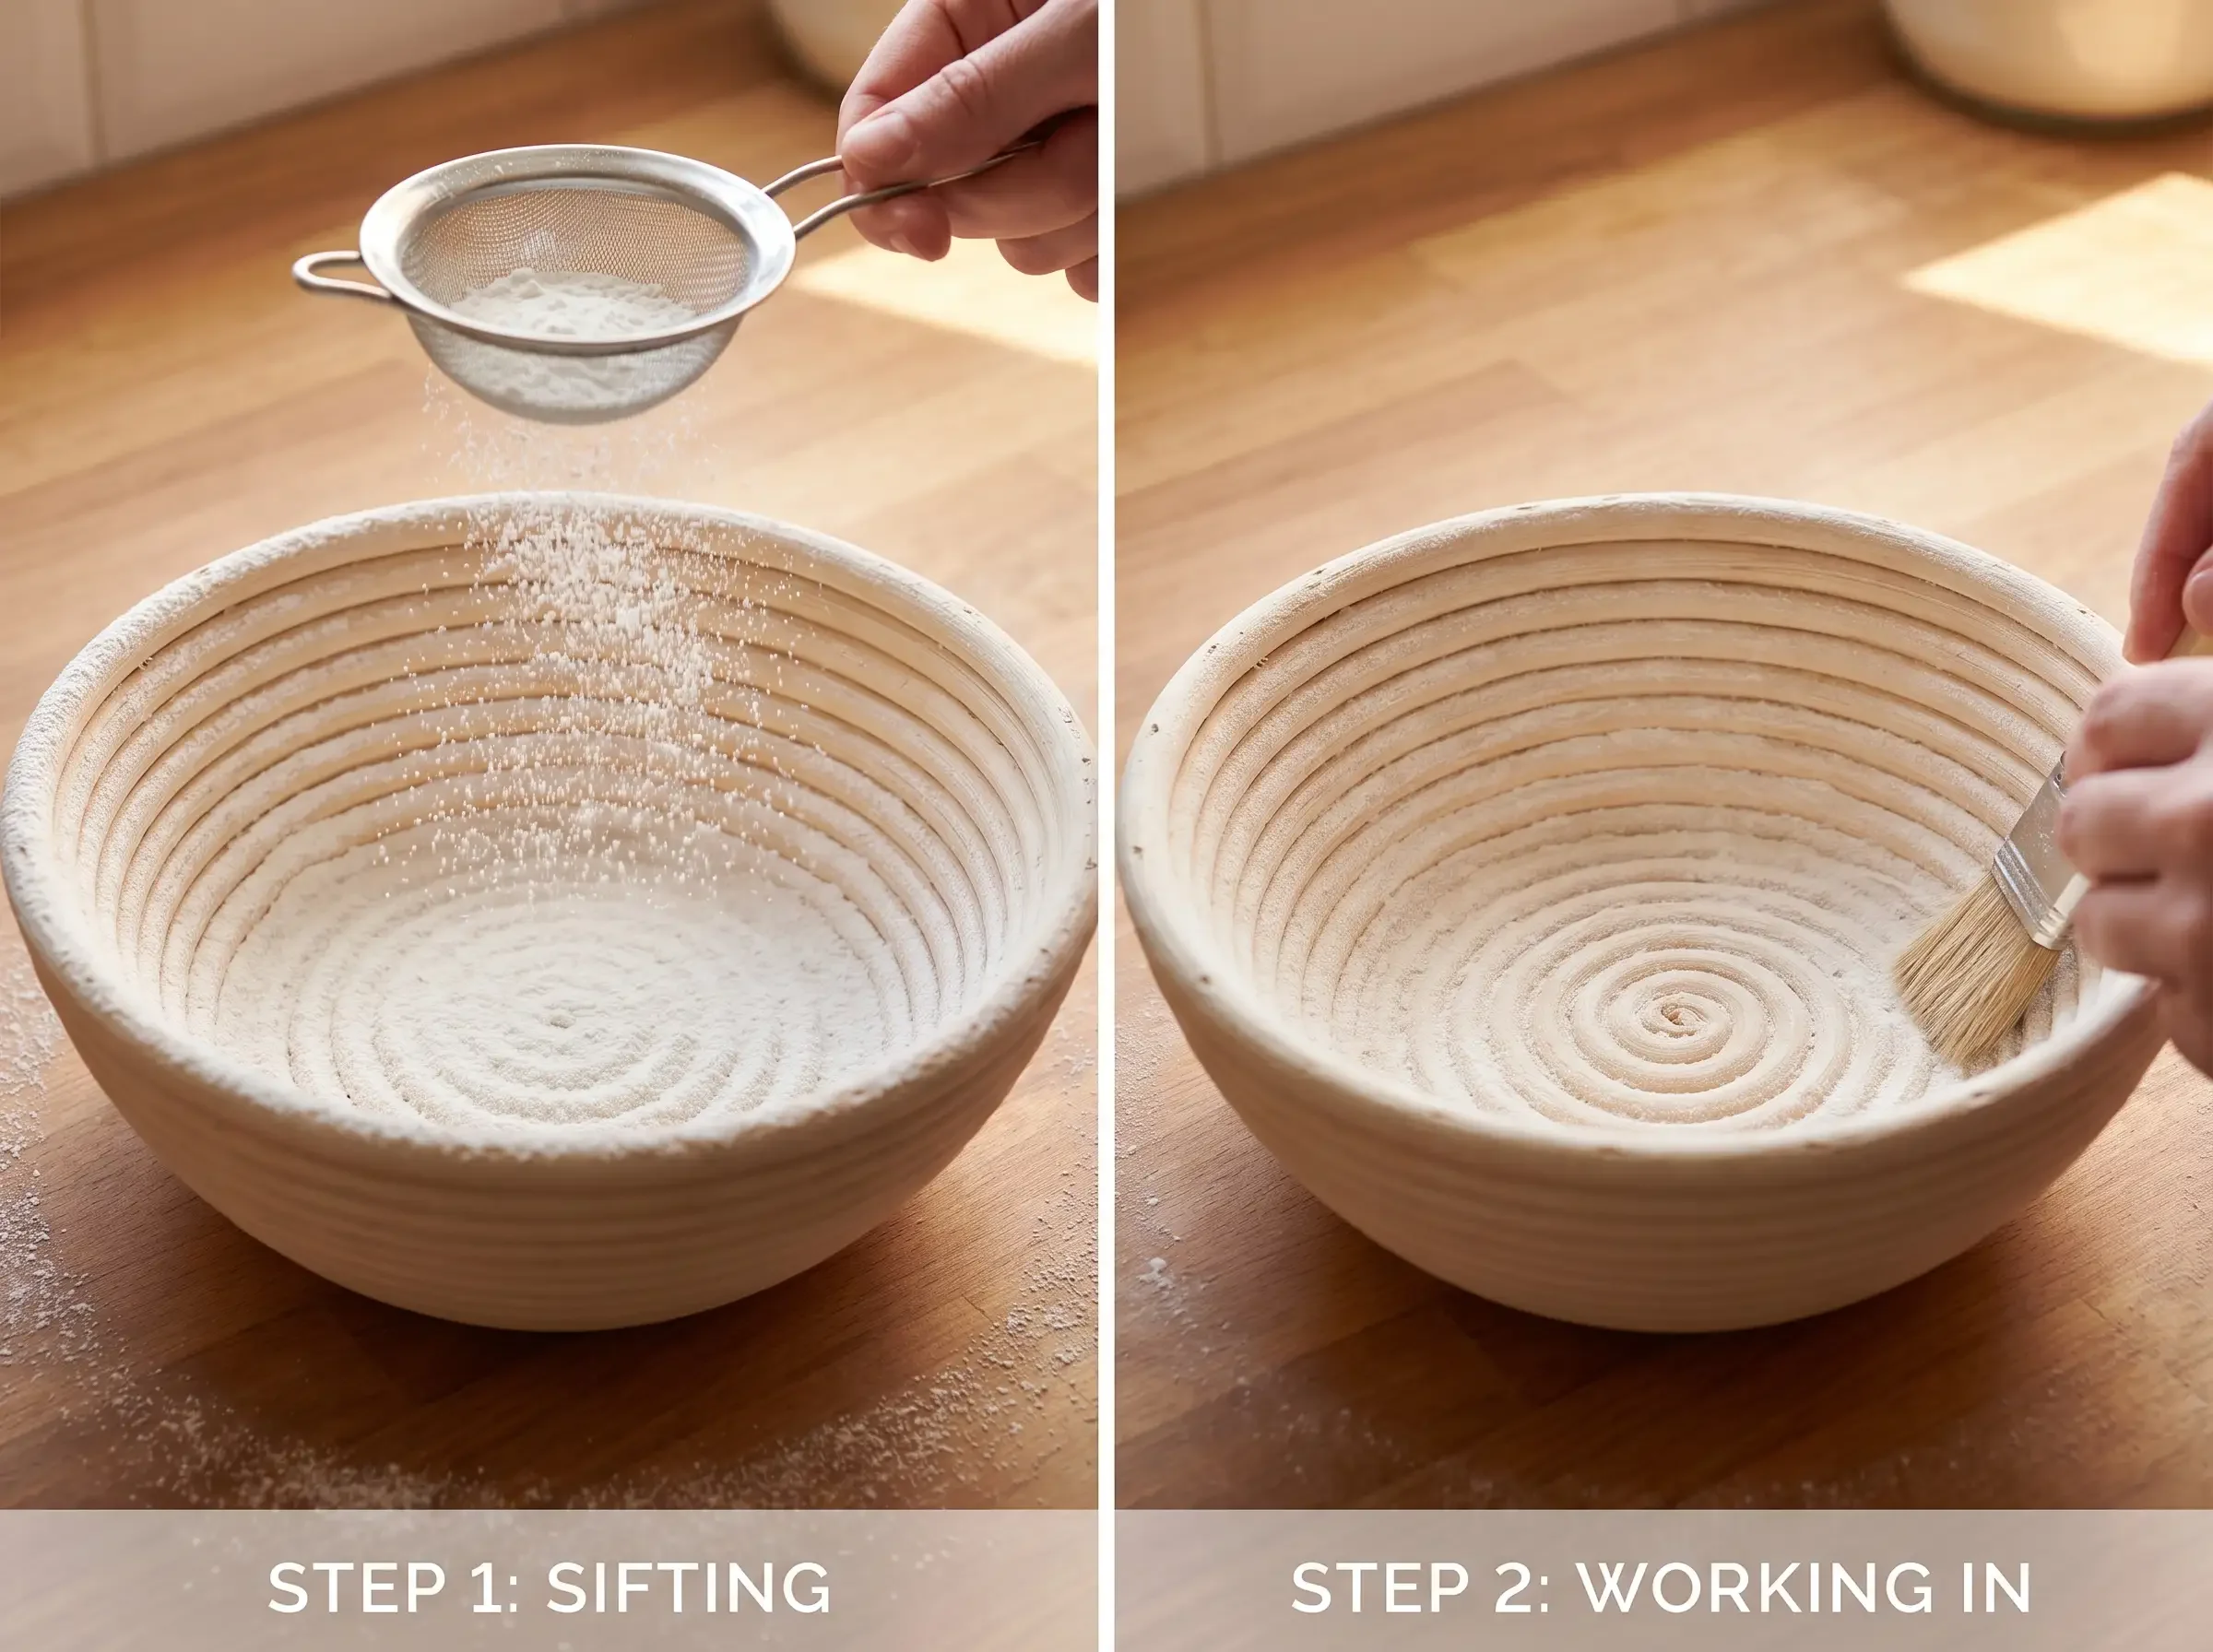
Add rice flour across the base, sides, grooves, and upper rim. Don’t sprinkle only the center. Dough expands during proofing and can touch the upper edge, so bare patches near the rim often become sticking points.
Use a small sieve for an even coating, or use your fingers if that feels easier. For the first prep, be more generous than you think. You’ll tap out the loose flour later, so don’t worry if the basket looks heavily dusted at this stage.
Rice flour works well because it doesn’t absorb into wheat dough as quickly. That helps form a dry barrier between the dough skin and the rattan. If you only have bread flour, use it, but consider rice flour for future bakes.
4. Work flour into every ridge and crevice
Press the flour into the spiral pattern with clean fingers or a pastry brush. Pay close attention to the base, the curve where the base meets the side, and the rim. These areas often get missed because flour naturally falls toward the center.
You’re looking for a thin, even coating with no shiny bare rattan showing. Don’t create a thick crust of flour. Heavy piles can clump, drop onto the dough, or leave chalky patches on the finished loaf.
A good test is to tilt the basket under the light. If you can see the spiral lines softened by a pale flour coating, you’re in the right range. If you see bare tan ridges, add more rice flour and work it in again.
5. Tap out loose excess
Turn the basket over above a towel or sink and tap it gently. Remove only the flour that is completely loose. Don’t aggressively brush away the flour that stuck to the lightly damp rattan.
This step keeps the coating even. Loose piles don’t help the dough release better; they usually fall into one spot. The flour that remains in the grooves is the useful part. It’s the beginning of the basket’s working surface.
6. Let the banneton dry completely
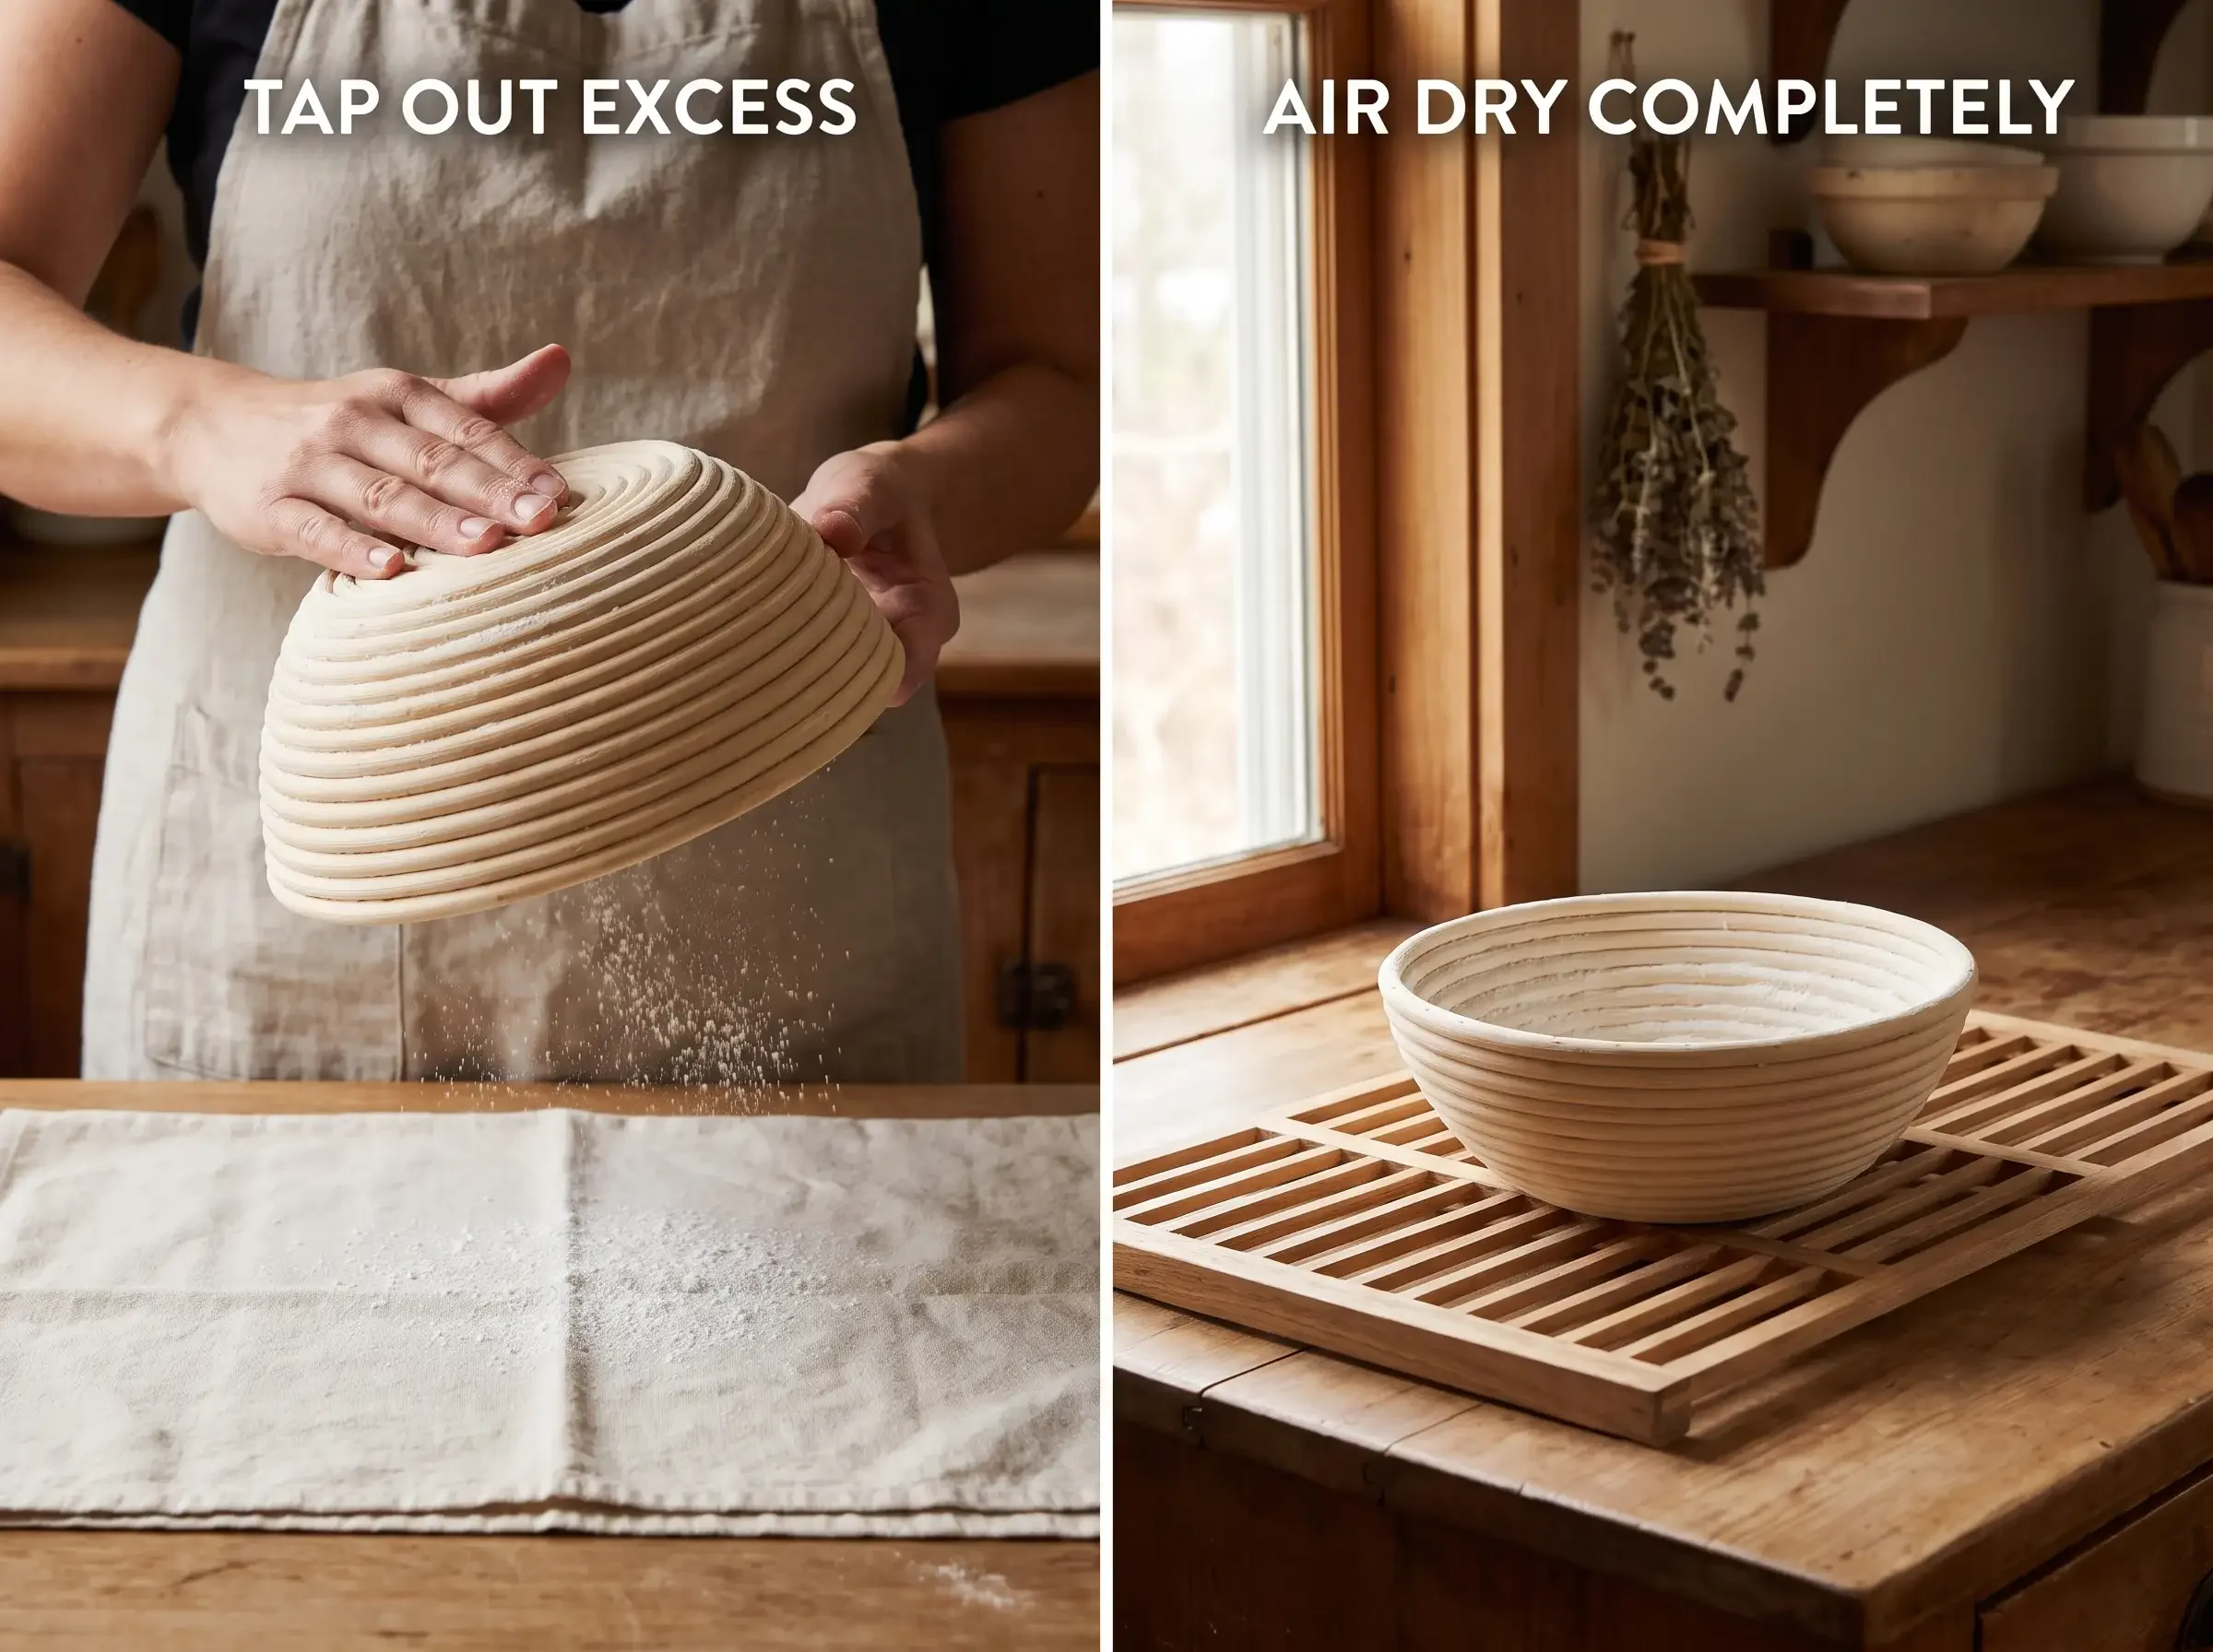
Place the banneton upright in a warm, dry, well-ventilated area for at least one hour. Give it more time if your kitchen is cool, humid, or if you used a little too much water.
The basket should feel dry, not cool or clammy. If it still feels damp, wait. Putting dough into a damp banneton is one of the easiest ways to cause sticking.
Don’t speed things up with a hot oven, microwave, or direct high heat. Natural rattan can dry unevenly or become damaged. Air drying is slower, but it’s safer and more consistent.
7. Dust again before the first proof
Right before you add dough, dust the banneton again with rice flour. This fresh layer matters because the dried prep layer is not a permanent coating. It simply gives the basket a better starting surface.
Use a slightly heavier dusting for higher-hydration dough. If the dough feels slack, shiny, or tacky after shaping, add extra flour to the basket and consider using the liner for this bake. It’s better to protect the loaf than to force bare-basket proofing too soon.
What should you not do to a new banneton?
The biggest banneton mistakes come from treating rattan like metal, glass, or silicone. It’s a natural, breathable material, so it responds best to light moisture, dry brushing, and full air drying.
Avoid these first-use mistakes:
Do not soak it. Excess water can soften natural rattan and make drying much harder.
Do not use soap or detergent. Porous rattan may hold fragrance or residue.
Do not wash it after every use. Dry brushing and complete air drying are usually enough for routine care.
Do not coat it with oil. Oil can turn rancid, collect residue, and interfere with the flour barrier.
Do not place wet dough into a damp basket. Extra moisture increases sticking risk.
Do not leave the grooves or rim bare. Unfloured areas are common sticking points.
Do not bake or microwave the basket. Direct high heat may damage the rattan.
If the basket becomes contaminated, develops visible mold, or has a strong musty smell, please don't ues it. Routine care is gentle. Problem cleaning is a separate situation.
How do you use the prepped banneton for the first proof?
For the first proof, flour the dry, prepped basket again and place your shaped dough seam-side up. The smooth side should face the floured rattan, which helps create that classic spiral pattern after release.
Good shaping matters here. A taut dough surface releases better than a loose, sticky one. If the dough is visibly wet, sticking to your hands, or spreading fast, pause before loading it into bare rattan. Add more flour, tighten your shaping, or use the liner.
When it’s time to release the dough, invert the basket in one confident motion over parchment or your baking surface. Lift the banneton straight up rather than dragging it sideways. If one small area catches, ease it away gently with floured fingers instead of pulling the whole loaf.
Your RattanVibe banneton came with a free liner, treat it as a helpful backup. It’s especially useful for wetter doughs, first bakes, or days when you want easier release with less stress.
What should you do after the first bake?
After the first bake, let the banneton dry fully before brushing it out. Wait until any damp flour or dough flakes have dried. Then use a dry brush to remove loose bits without scrubbing away the fine flour layer settled in the ridges.
That thin layer is part of how the basket becomes easier to use over time. It isn’t permanent, and it doesn’t replace fresh flouring, but it does help condition the working surface. Consistent drying is just as important as consistent flouring.
Store the basket completely dry in a ventilated place. Avoid sealed plastic bags, damp cupboards, or stacking it while moisture remains inside. If you notice a musty odor, visible mold, or compacted sticky residue, stop using the basket until it has been properly cleaned.
A well-cared-for banneton rewards simple habits: flour before proofing, dry after use, brush when dry, and store with airflow.
FAQs:
Do you have to season a new banneton?
Yes, but “season” means establishing a light flour layer, not adding oil or heat. Lightly dampen the basket, coat it with rice flour, work the flour into the grooves, and let it dry for at least one hour before the first proof.
Can I use all-purpose or bread flour instead of rice flour?
You can use all-purpose or bread flour if that’s all you have. Rice flour is usually better for banneton prep because it stays drier against wheat dough and creates a more dependable release barrier, especially when you’re using a banneton for the first time.
Should I wash a new banneton before using it?
Usually, no. Inspect the new banneton, remove loose debris with a dry brush, and follow the manufacturer’s care instructions. Washing adds moisture to porous rattan, so it’s not part of normal first-use preparation unless there is a specific cleaning concern.
How long should a banneton dry after prep?
Let the banneton dry for at least one hour after first-use prep. In a cool or humid kitchen, give it longer. The basket should feel fully dry, not cool, damp, or clammy, before you add fresh flour and dough.
Do I need to flour the banneton every time?
Yes. First-use prep helps start the basket’s working surface, but it doesn’t create a permanent coating. Dust with rice flour before every proof, and use a slightly heavier coating for wetter doughs or longer cold proofs.
Conclusion: Five minutes now can save your first loaf
Learning how to prep a banneton is simple: lightly dampen the rattan, dust generously with rice flour, work the flour into the grooves, tap out loose excess, dry fully, and flour again before adding dough.
That small ritual takes only a few active minutes, but it can help prevent the frustrating first-loaf sticking problem. If very wet dough still makes release stressful, use the included liner that came with your basket or choose a matching spare proofing basket liner in the right shape and size.